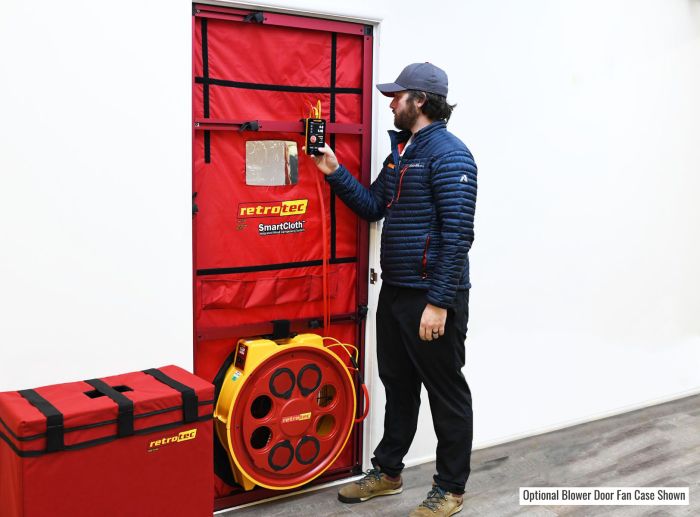
Air leakage in a home can lead to significant energy waste, increased utility bills, and an uncomfortable living environment. A Blower Door Test is a reliable method to assess how airtight your home is, helping you pinpoint where air leaks occur and understand how to improve your home’s energy efficiency. This guide will walk you through what a blower door test is, why it’s essential, and how it can benefit you. This setup is from Retrotec
What is a Blower Door Test?
A Blower Door Test is a diagnostic tool used to measure the airtightness of a building. It involves installing a powerful fan into the frame of an exterior door, which either pressurizes or depressurizes the home. The test measures the rate at which air leaks through unsealed cracks and openings, providing a comprehensive view of the home’s air leakage.
The blower door testing kit typically consists of:
- A temporary door frame with an adjustable frame to fit the door opening.
- A calibrated fan that measures airflow and creates a pressure difference between the inside and outside.
- Pressure gauges that record the difference in pressure, allow the calculation of air leakage.
Why Conduct a Blower Door Test?
Conducting a Blower Door Test offers several advantages for homeowners:
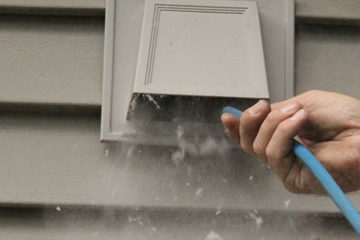
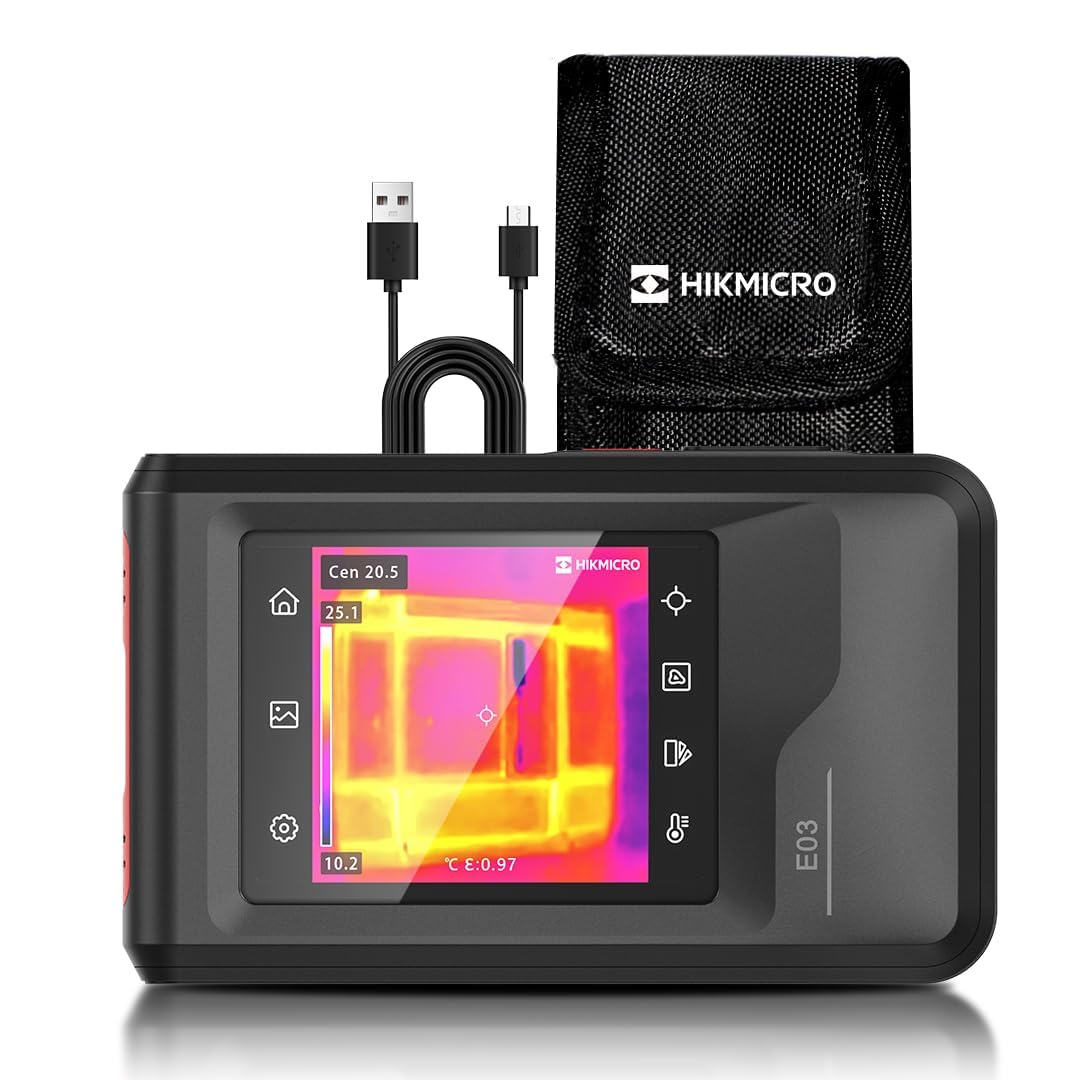
- Identify Air Leakage: Helps find the specific areas where air is escaping or entering, such as around windows, doors, and vents. The use of a thermal Imager or fog machine works great here
- Ensure Code Compliance: Meets building codes and standards for energy efficiency, especially in new constructions or major renovations.
- Improve Indoor Air Quality: Reduces drafts, enhances comfort, and improves air quality by minimizing the entry of outdoor pollutants.
- Save on Energy Costs: By identifying and sealing leaks, homeowners can reduce heating and cooling costs significantly.
How is a Test Conducted?
A Blower Door Test involves several key steps to accurately measure air leakage:
- Preparation: Before the test, all windows, doors, and vents are closed and sealed. Any openings that are intentionally designed for air circulation are shut off temporarily.
- Installation of Blower Door: A blower door is set up in an exterior doorway, creating an airtight seal. The fan within the blower door is used to pressurize or depressurize the house.
- Running the Test: The fan is turned on to create a pressure difference between the inside and outside of the home. The test records the airflow rate needed to maintain this difference, identifying how much air is leaking.
- Detecting Leaks: Professionals often use smoke pencils or infrared cameras to visualize air leaks during the test. This step helps pinpoint specific problem areas.
- Analyzing Results: The test results are usually expressed in terms of air changes per hour (ACH). A lower ACH number indicates a more airtight home.
Common Areas of Air Leakage in Homes
During a Blower Door Test, the following areas are frequently found to have air leaks:
- Windows and Doors: Gaps, cracks, or poor seals around windows and doors can allow air to flow freely.
- Attics and Basements: Unsealed ducts, gaps in insulation, and cracks in walls are common culprits.
- Walls and Ceilings: Small holes, cracks, and unsealed outlets often go unnoticed but can contribute significantly to air leakage.
- Ventilation Systems: Leaky ducts and exhaust fans can allow outside air to infiltrate the home.
Benefits of Reducing Air Leakage
Reducing air leakage in your home after a Blower Door Test brings numerous benefits:
- Energy Efficiency: Lower utility bills due to reduced heating and cooling needs.
- Enhanced Comfort: Elimination of drafts and temperature fluctuations creates a more comfortable living space.
- Improved Indoor Air Quality: Reducing leaks minimizes the entry of dust, allergens, and moisture, creating a healthier environment.
- Environmental Impact: Lower energy consumption translates to a smaller carbon footprint and reduced greenhouse gas emissions.
Tips for Preparing Your Home for a Blower Door Test
To get the most accurate results from a Blower Door Test, follow these preparation tips:
- Ensure all windows, doors, and dampers are closed and sealed.
- Remove any obstructions around doors and windows to allow easy access.
- Expect some noise from the blower fan and slight changes in indoor pressure during the test.
- Communicate with the testing professional about any specific concerns or areas of interest.
Cost and Accessibility of Testing
The cost of a Blower Door Test can vary depending on the location, size of the home, and the testing professional’s rates. Generally, the cost ranges from $200 to $500. While hiring a professional ensures accuracy and compliance, DIY testing kits are available for those looking to conduct their own tests. However, professional testing is recommended for reliable results and expert analysis.
Code Compliance for Blower Door Testing in Alberta:
Airtightness Standards:
- The ABC specifies a maximum air leakage rate, often expressed in air changes per hour (ACH) at a pressure differential of 50 Pascals (ACH50). The standard ACH50 level can vary depending on the type of building and the energy performance targets.
- For example, in many parts of Alberta, new residential buildings are required to achieve an airtightness level of 2.5 ACH50 or lower to meet energy efficiency standards. However, this can vary, so local requirements should always be checked.
You can read more about Code Compliance in Alberta in this article.
A Blower Door Test is a valuable tool for identifying and reducing air leakage in your home. By understanding where leaks occur and taking steps to seal them, you can improve your home’s energy efficiency, comfort, and air quality. For homeowners interested in maximizing their home’s performance and minimizing energy costs, scheduling a blower door test is a smart step. Consider contacting a professional to discuss your options and ensure your home is operating at peak efficiency.